NVDB Feature panel - Selection and information
The centric place for editing NVDB features is the Feature panel. When a layer is added (NVDB layers), that layer appears in the Feature panel layer selector. Check the generic documentation on how to use the Feature panel to know more.
Selecting NVDB features
Features are selected in the same way as any feature of a vector layer. Check generic funcionality for selection to know more about this.
Once features are selected and one NVDB layer is selected in the Feature panel layer selector, the selected features appear in the Features list. Each feature is a row in the list and has this components:
- a checkbox to mark the feature,

- a button to expand related features,
 . If this button is used parents and child objects of the clicked object are shown below the row in the list, as a tree that show object types and objects inside those objects types that are related to the given object. The tree can be expanded or collapsed completely or partially using the expand buttons on the left.
 - the icon of the geometry type (point, line or polygon),

- the icon with the visual style of the layer,

- the ID of the feature,
- some buttons on the right to do actions in the feature.


The ID of each NVDB feature shown in the Feature list follows this convention:
- For existing NVDB objects: NVDBXXX-ZZZZZZ where NVDB denotes the object exists currently in the NVDB catalog, XXX is the ID number of the object type, and ZZZZZZ is the ID number of the object inside the object type.
- For new created NVDB objects: BUYYYYYY where BU denotes the object is new and created using Mapspace services and YYYYYY an unique ID number for the object. Be aware that this number starts as a negative number and increases towards zero as long as new objects are created.
Obtaining information of features
Features are marked in the Feature list the same way as any feature of a vector layer. Check generic funcionality for features to know more about this.
For NVDB features there is a difference when obtaining information with respect to generic functionality. The content of Attributes list is different depending on what row in the Features list is clicked:
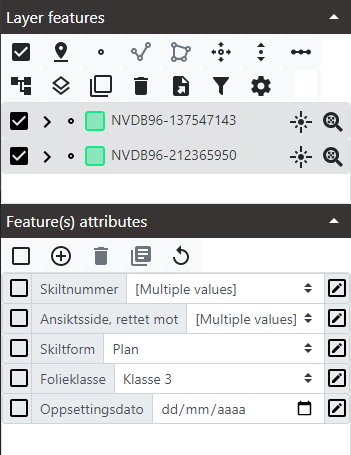
- If one or several feature rows are clicked and marked in the Features list, the content of the Attributes list show the attributes of that features in edit mode. If only one feature is marked, all the attributes of that feature are shown in edit mode. If several features are marked only the attributes that are common to all the features and that are not complex attributes (like geometry attributes) are shown. If a feature was marked and is clicked again, it is unmarked and the Attributes list will be empty.
- If any feature has related objects expanded and a related feature is clicked it is shown as selected and Attributes list will show the attributes of that related feature in read-only mode. Only one related feature can be shown at a time. To show the attributes of the main feature and not attributes of the related feature, click again in the related feature to remove selection from it.
Below is an example of the Attributes list showing the common attributes of two NVDB features in edit mode.
Showing related NVDB features of one parent feature
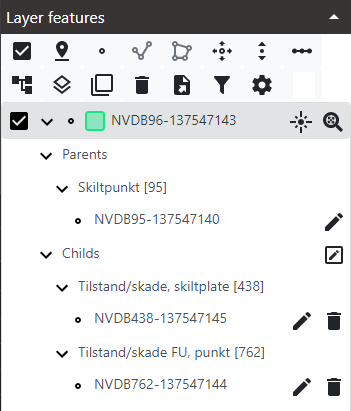
Each NVDB feature can have defined a number of children features related to it, and also any number of ancestors or parents. The Feature list in the Feature panel can show the parents & children related features for each feature.
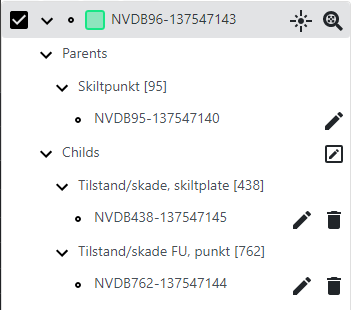
To expand the feature to show related objects click in the Expand button of the feature. The button changes icon to expanded. After related features are requested to NVDB servers, they will appear under main feature as a treeview divided in two headers: Parents and Childs. If the object has no relationship of type parent or child then that header is not shown. Below each header related objects are grouped together by object type.
To collapse all the relations of a feature, click the Collapse button.  that is in the main feature. To collapse parts of the tree of relationships, click in the Collapse button in any sub element in the tree.
The Childs section has a Set as korriger button on the right. This button is a checkbox and when clicked it alternates between two states:
- As Oppdater:
 When in this state that means that any change made to the current list of childs will be sent to NVDB write services as an oppdater change. An oppdater change (or update) means that the change is a new state in the object and that the change must be saved in the historical versions of the object.
 - As Korriger:
 When in this state that means that any change made to the current list of childs will be sent to NVDB write services as a korriger change. A korriger change (or correction) means that the change is not needed to be saved in the historical versions of the object and is a fix of a previous bad state.
Only child relationships can be modified. Parent relationships are refreshed internally by NVDB services when changes are sent.
Each related object can have one or two buttons on the right:
- Add feature to viewer button.
 Click in this button to execute the following tasks:
- Ensure that a layer with the object type of the clicked object exists in active viewer. If layer do not exists then a new one is added of the given type.
- Ensure that the feature that matches clicked object exists in previous layer. If not, the feature is requested to NVDB services and added to the layer.
- Select the previous feature and set as the only feature to edit in the Feature panel.
- Delete relationship button
 Check section Adding and removing related features on how to add or remove relationships.
Finding the Vegreferanse of a location
The Vegreferanse is a unique and compact ID string that each point of a NVDB road has. It serves as standard way to do indications about a certain location in the map. To know more about this ID check this: NVDB Road reference system.
To obtain the Vegreferanse follow these steps:
- Click in the Show NVDB reference button in the button bar of the Features section.

- An icon will be drawn in the viewer in the location clicked. If the location clicked is to far away from an NVDB road then a warning message will appear. If not the Vegreferanse is shown. Both the v.3 and v.2 of the Road reference are shown.
- The Vegreferanse is shown as a small popup in the bottom of the active viewer. Click in the Close button to hide it. Click in the Copy button to copy the text to clipboard.

Other useful information of NVDB functionality: