Feature panel - Features
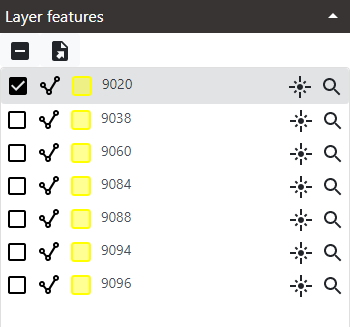
The tools to manage features appear on top of the Feature list. This tools can be different for each layer depending on available functionality for the given layer or user permissions.
Obtain information of features
To obtain information of a feature follow these steps:
-
Use the selection tools as explained in Selecting features
-
Mark one, several or all features in the Features list.
- Click in the checkbox in any feature to mark it.
 Click again to unmark
- Click once in the checkbox in on top of Feature list to mark all features Click again to unmark all features if there are any number of features marked. When there are some features marked but not all the top checkbox will show a mixed icon

- Click in the checkbox in any feature to mark it.
-
The Attribute list will show the attributes that are common to all the marked features in the Feature list. If only one feature is marked, then it will show all the attributes of that feature. If several features are marked, attributes shown only will be those that exist at the same time in all marked features. If values are not coincident in some attributes then the value will be Multiple values.
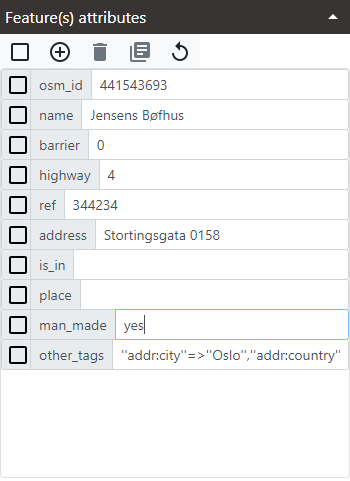
When a vector layer is not editable the attributes will be shown greyed.
Change style of features
Features have two styles that can use to render. One style is given through the layer settings. This is the default. Another style can be a custom style internal to each feature. When the custom style exists, it overrides the layer style.
To change the layer style check Styling layers
To set or unset the custom style for a feature follow this steps:
-
Mark a feature in the Feature list*.
-
Click in the Chage style of feature button.

-
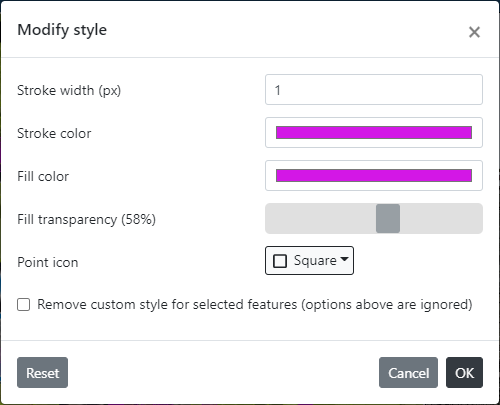
The Modify style dialog opens. The use is the same as described in Styling layers but instead of defining the style for the layer here we define the style of a single feature.
-
To unset the custom style to the feature check the Remove custom style for selected features. This will remove the custom style when accepting the dialog. (The rest of the options will be ignored).
-
Click OK button to accept setting or unsetting the custom style.
Custom styles are only persisted in the workspace for Measurements and Annotations layers. For any other vector layer custom styles do not persist more than in the current user session in the browser.
Highligth and zoom to features
To highlight a given feature in the viewer mark the feature and click in the Highlight feature button. 
To zoom to a given feature in the viewer mark the feature and click in the Zoom to feature button. 
Delete features
To delete one or several features:
- Mark or or several features in the Feature list.
- Click in the Delete features button.

- A confirmation will be prompted.
- Feature removal is only available for certain vector layers. It is allowed in Measurements, Annotations and layers from local files. It is not allowed for remote vector layers as layer from Mapspace WFS services.
Export features
To export all or selected features follow these steps:
- Mark one or several features in the Feature list. It is not needed for exporting the whole selected layer.
- Click in the Export button.

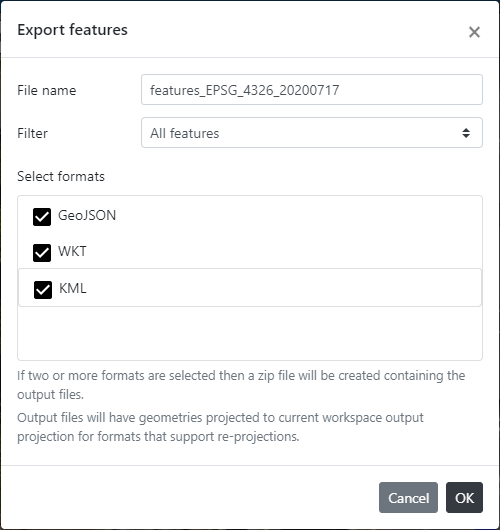
- The Export dialog opens. Type a name for the file or accept the default. Select the filter to apply to the layer. Select the format or formats. If several formats are selected then a ZIP file will be created to contain them.
- Click OK button to export.
Create PDF report
To create a PDF report with information of the current selected features, proceed like follows:
- Select any number of features by any of the means explained in in Selecting features.
- Mark one or several features in the Feature list. If no feature is marked then no one will appear in the table of the report.
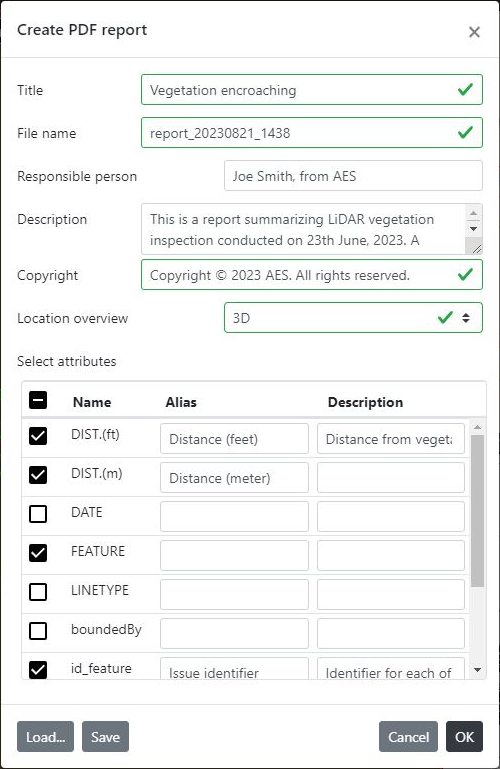
- Click in the Create PDF report button.

- The Create PDF report dialog opens. Enter a title, filename and copyright text. Optionally enter a description and a responsible person.
- Select an optional viewer that will be used in a small screenshot to be shown as an overview map.
- Select the attributes that are wanted to be shown in the Attribute list. Optionally, it is possible to set an alias and a description for each attribute. Aliases will replace the real names of attributes in the table to be created, and descriptions will be used as a explanation text of the content of the table.
- Click in the Save button to save the current settings of the report in a JSON file (with same filename as the report).
- Click in the Load button to load an existing JSON file with a report previously saved. The values in the dialog will be updated accordingly.
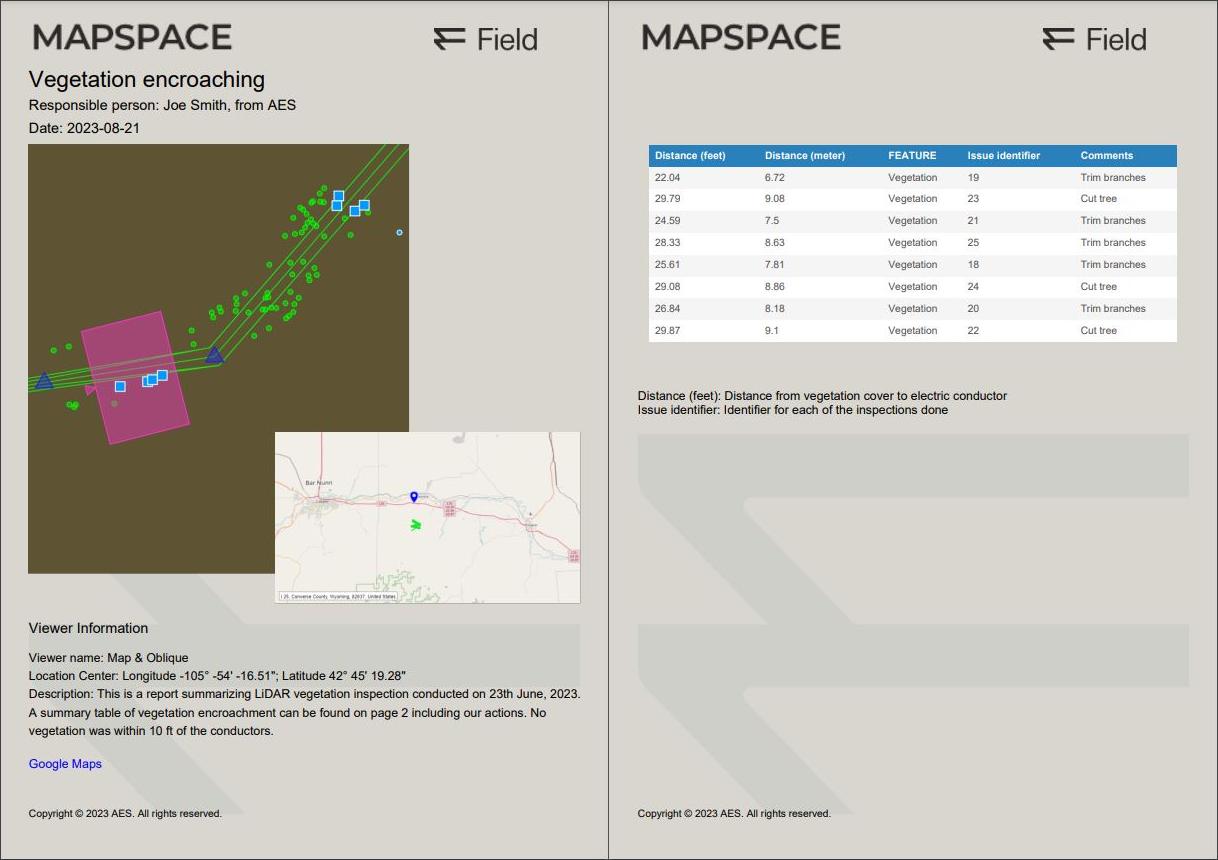
- Click in OK to create the report. Below is shown an example of PDF generated.
Other useful information about the Feature panel: