Dashboard - User Vector layers
From this section users can access the user space and management tools for vector layers.
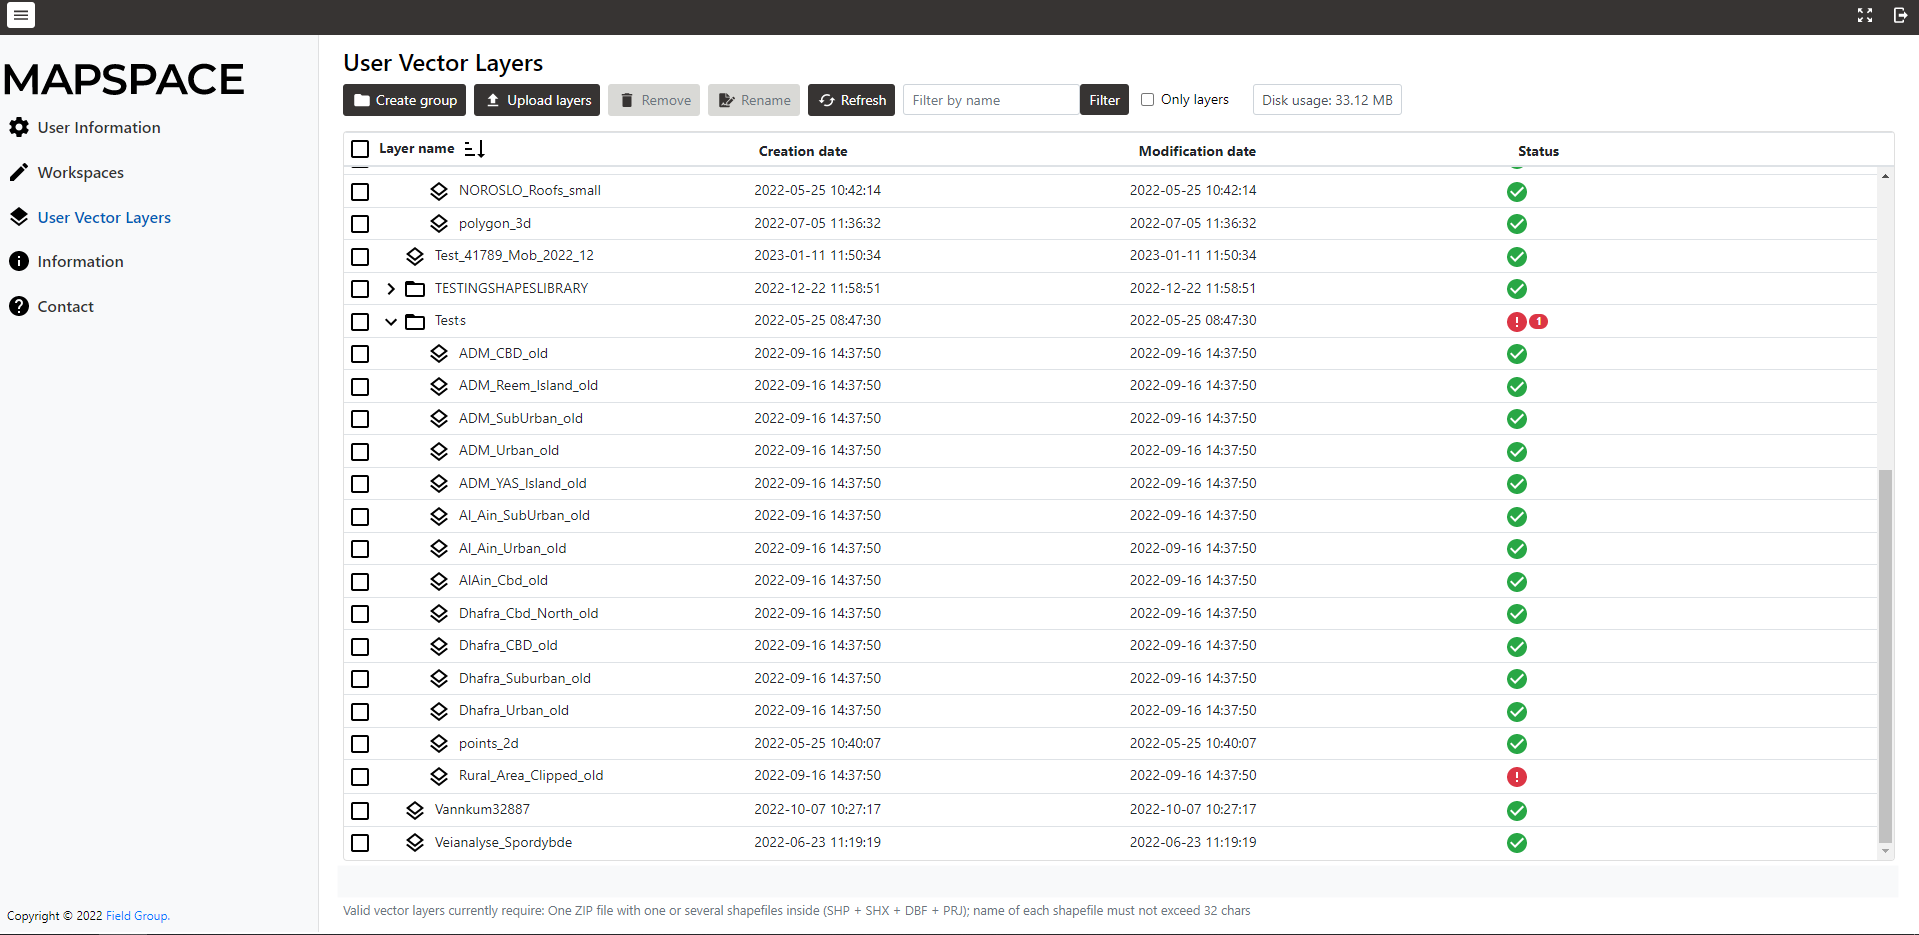
The functionality available in this section can be summarized as:
- Creation of layer groups
- Uploading of vector layers
- Removal of different items
- Rename of one selected item
- Refresh the list to update to current status
- Filtering
Creation of layer groups
To create a layer group in the top level:
- Ensure that no item is selected in the list
- Click in Create group button.
- Enter the name for the new layer group and click OK.
To create a layer group under any existing layer group:
- Ensure that one and only one existing layer group is selected in the list.
- Click in Create group button.
- Enter the name for the new layer group and click OK.
Layer groups are saved in Mapspace storage services and do not consume disk usage.
Uploading of vector layers
To upload vector layers in the top level, outside any existing layer groups:
- Ensure that no layer group item is selected.
- Click in the Upload layers button.
- Select the file with the vector data. Valid vector layer files currently require only one ZIP file with one or several shapefiles inside (SHP + SHX + DBF + PRJ files per each shapefile). The name of each shapefile must not exceed 64 chars and comply with XML naming restrictions.
- A new upload task is created and shown in progress. While Dashboard is open the content list is refreshed periodically to know the status. When the task is finished the Status column will show if load was successful or failed. Hover the mouse over the icon in a layer to show the error if load failed.
To upload vector layers under any existing layer group:
- Ensure that one and only one existing layer group is selected in the list.
- Follow the previous instructions.
- When any layer fails in the upload the layer groups containing the failed layer show an icon and the number of failed layers.
Vector layers are saved in Mapspace storage services and consume disk usage. Be aware that there is a maximum limit in size of this storage. Check the amount currently used in the Disk usage information label on the button bar.
Removal of different items
To remove any number of items, either layer groups or layers:
- Select the items to remove.
- Click in Remove button.
- A new removal task is created. Once terminates the items will be removed from the list.
- When selecting a layer group, all layers contained in the layer group are also removed.
Removal actions recovers disk usage.
Rename of one selected item
To rename any item in the list:
- Ensure that one and only one existing item is selected in the list.
- Click in Rename button.
- The item is renamed in Mapspace storage services and will be updated in the list.
Refresh the list to update to current status
To refresh the list and the status of tasks:
- Click in Refresh button at any time.
Filtering
To filter items in the list:
- Type a word for filtering in the Filter by name textbox.
- Click Filter button.
- Only layer groups and layers that contain the text are shown. If a layer group is not shown all the contained layer groups and layers are hidden.
- Alternatively, to filter only layers, check Only layers checkbox.
Adding layer groups to a viewer
Addition of user layer groups or layers is done using the Toolbox. Check Toolbox
Other useful information about the Dashboard: