Dashboard - Workspace settings
Worskpace settings
There are three types of settings that can be changed:
- Settings for the whole workspace.
- Settings for viewers that can be changed with the workspace opened or without having it opened.
- Settings for viewers that can be changed only with the workspace opened.
The first and second type of settings can be changed from the Dashboard and are explained next. For viewer settings that only can be changed with the workspace opened, refer to Viewer tools - Viewer settings
From the Dashboard users can change the workspace output projection, default geocoding provider, default map provider or navigation control for global viewers and other settings.
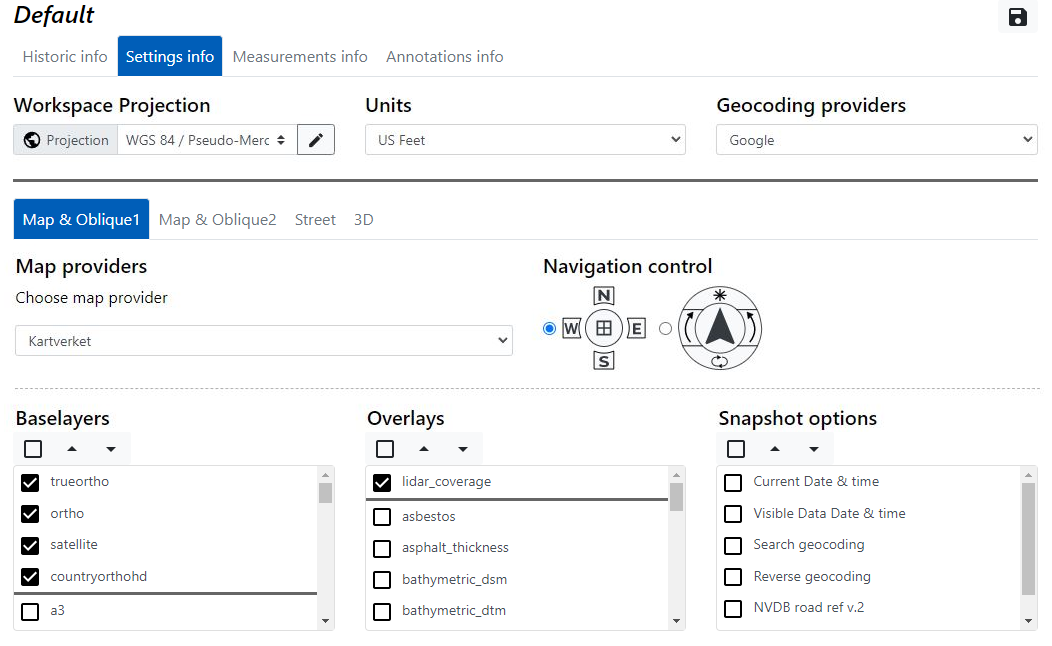
The workspace output projection and the default geocoding provider are settings for the whole workspace. They can be changed as follows:
- Select a workspace in the list of available workspace. You can select the current opened workspace or any other without the need to open it.
- Select the Settings info tab in the settings section for the selected workspace.
- Click the Edit projections button. The Manage projections dialog opens. Refer to Dashboard - Change output projection for further instructions.
- Select the units in the Units dropdown. This units are used in measurements that are not coordinates measurements, like when measuring lengths or areas.
- Select the geocoding provider in the Geocoding providers dropdown.
- Click in the Save workspace settings button in the top-right corner of the settings section. (Not in the same button of the top menu).
The default map provider, navigation control, baselayers, overlays and snapshot options, all are viewer settings that can be set without the need to open the workspace. For this follow next steps:
- Select a workspace in the list of available workspace. You can select the current opened workspace or any other without the need to open it.
- Select the Settings info tab in the settings section for the selected workspace.
- Select the tab of the viewer you want to change the settings for.
- Select the default map provider in the Map providers dropdown. The default map provider will appear as a layer in the viewer that be activated easily through a tool in the Toolbox or in the Shortcut toolbar of the viewer.
- Select the type of Navigation control the viewer must use. The control on the left has buttons that allow to switch between ortho or oblique mode so user can force if ortho mode must be maintained at any zoom scale. The control on the right has no button on it for switching between ortho and oblique mode, and instead the viewer uses an additonal control for it.
- The baselayers, overlays and snapshot options are used the same way. They have a list of the full set of options available to the user. Click in the checkboxes on each option to add it. The checked options are moved on top of the list in a new section of checked options. Click again to uncheck and remove from the checked list. Additionally, you can change the priority in the checked items selecting them and then pressing in the Increase priority and Decrease priority buttons. The priority will be used in a different way for each type of setting:
- For baselayers the priority will be set as a parameter in the requests mades to the server, so the image tiles returned will be prioritized following the order in the list.
- For overlays the priority has no special meaning.
- For Snapshot options, the order in the list will be the order in which the information will be renderer in the snapshots.
- Finally, click in the Save workspace settings button in the top-right corner of the settings section to apply changes. (Do not use the same button of the top menu).
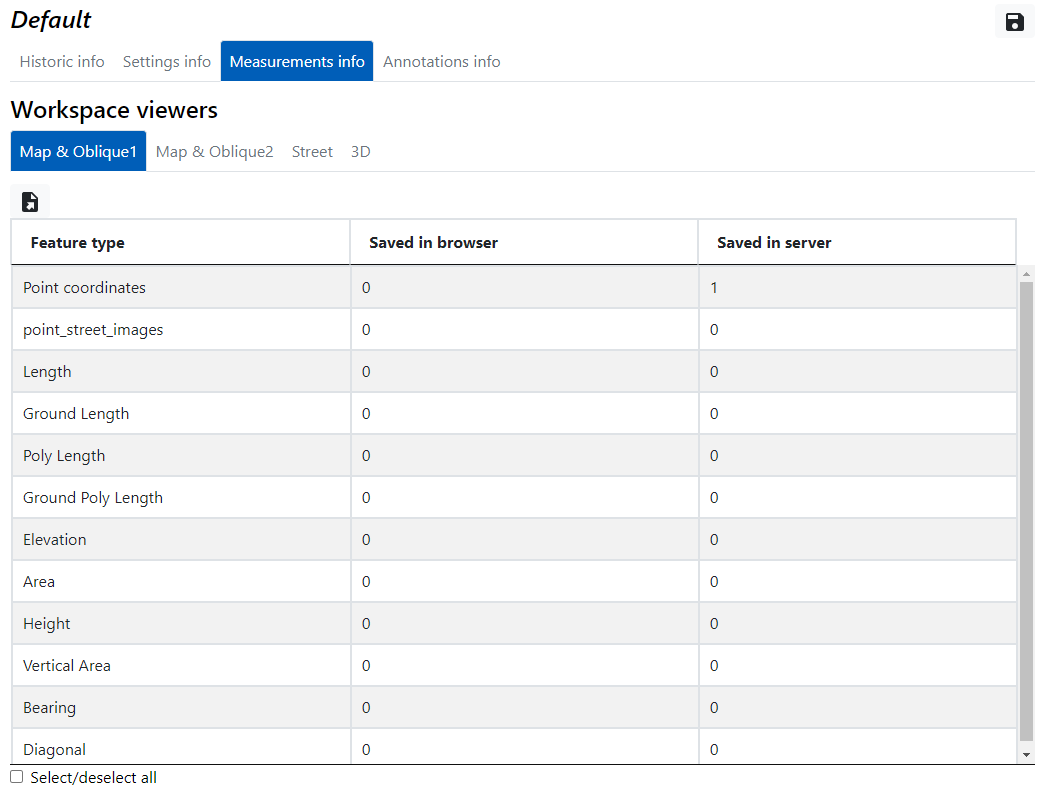
Measurements information & management
In this section users can view the measurements contained in a workspace viewers.
- Feature type: measurement name.
- Saved in browser: measurements saved in local storage.
- Saved in server: measurements saved in the urbex data base.
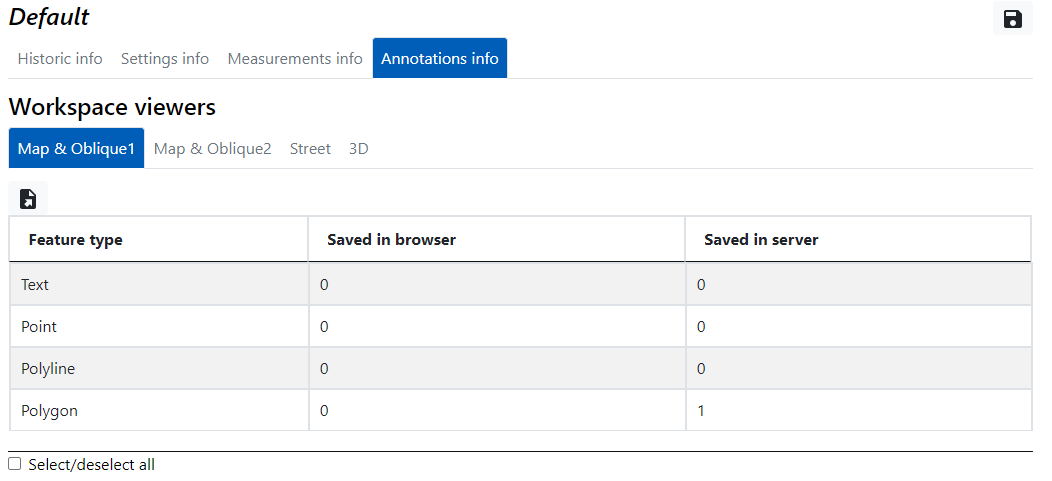
Annotations information & management
In this section users can view the annotations contained in a workspace viewers.
- Feature type: annotation name.
- Saved in browser: annotations saved in local storage.
- Saved in server: annotations saved in the urbex data base.
Other useful information about the Dashboard: